Counterweights often get a bad reputation as clunky and inconvenient. But for perfect visual observations it is great to be able to easily push the telescope around in a completely smooth way. Correct and smart use of counterweights can improve the quality of your observations.
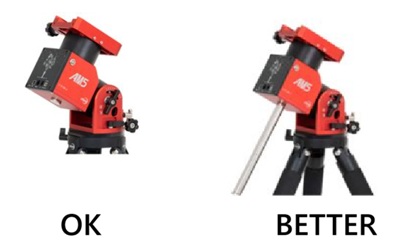
New mounts like strainwave designs can operate with little or no counterweight, but this comes with hidden costs that affect both comfort and precision.
Why Counterweights Matter
A telescope system functions like a lever. Counterweights balance the system, enabling:
- Effortless movement – Light set clutches make manual pointing and tracking smooth. On many strainwave mounts, manual movement is impossible, which can make visual observing less enjoyable.

- Better tracking and reduced stress – A balanced system reduces wear on gears and motors, improves tracking consistency, and decreases the mechanical strain on the mount.
- Improved pointing and stability – Even a well-built stiff mount will experience flexure. The tripod will see changing loads leading to flexure and changing contact to the ground.
Proper balance minimizes these effects, ensuring the telescope stays aligned and pointing remains accurate as well as polar alignment.
- Safety and security – An unbalanced system risks tipping the entire tripod, mount, and telescope when the mount slews and load shifts. It can also suddenly swing if brakes are released accidentally or during a power loss, potentially causing damage or injury.
Without counterweights, clutches must often be tightened hard, flexure increases, and the mount experiences added strain. While astrophotography software can compensate to some degree through plate solving and guiding, visual observing provides no such correction, making balance crucial.
Balancing an Alt-Az Mount for perfect visual observations
When balancing an Alt-Az mount only the altitude axis has to be considered. The vertical Azimuth axle is always balanced when it comes to rotation, but remember to keep an eye on the risk of tipping the mount when adding a heavy telescope to one side of the mount head.
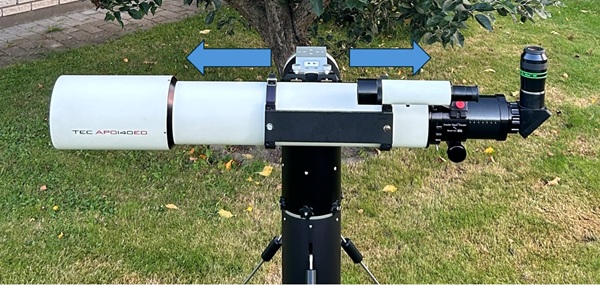
Side-Mounted Telescope
Alt-Az mount with side mounted telescope is the most common design.
- Place the telescope horizontal and slide the dovetail plate in the saddle until it is lengthwise balanced.

- Tilt the telescope to a near-vertical position and adjust the counterweight to achieve vertical balance.

Many mounts do not provide a way to balance vertically (sometimes called Y-axis balancing), meaning the telescope may slide away when pointing high in the sky. Accessories like finder scopes and eyepieces shift the balance away from the OTA center, making vertical balancing essential. This issue becomes more pronounced with heavier eyepieces or binoviewers.
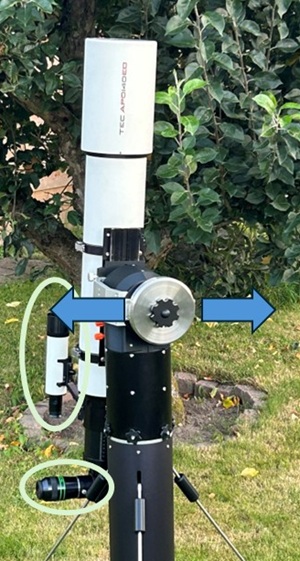
Top-Mounted Telescope
- Place the telescope horizontal and slide the dovetail plate in the saddle until lengthwise balanced. Enjoy the horizontal saddle making the adjustment safe and easy.

- Tilt the telescope to near vertical and move counterweights on the arms until balanced.

Top-mounted setups must have vertical balancing, as the telescope is away from the altitude axis and will exert more leverage on the mount. All installed accessories are balanced in the same process.
Comfort Balancing
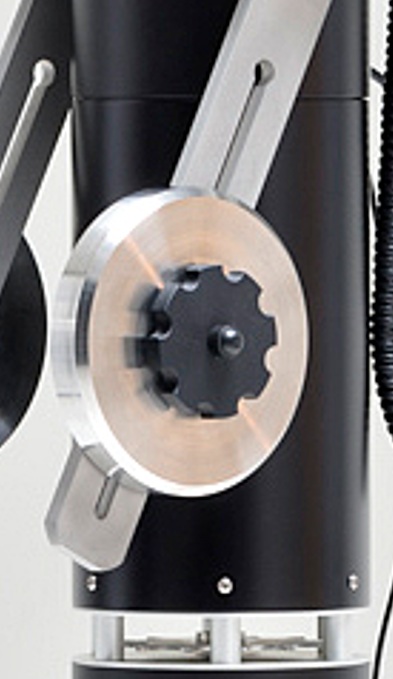
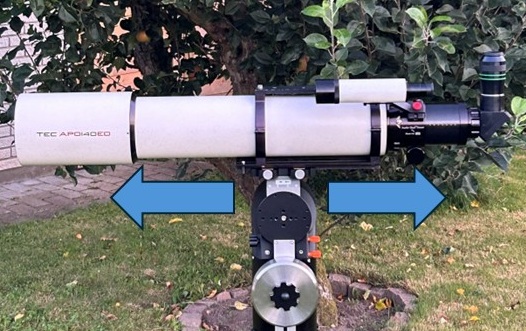
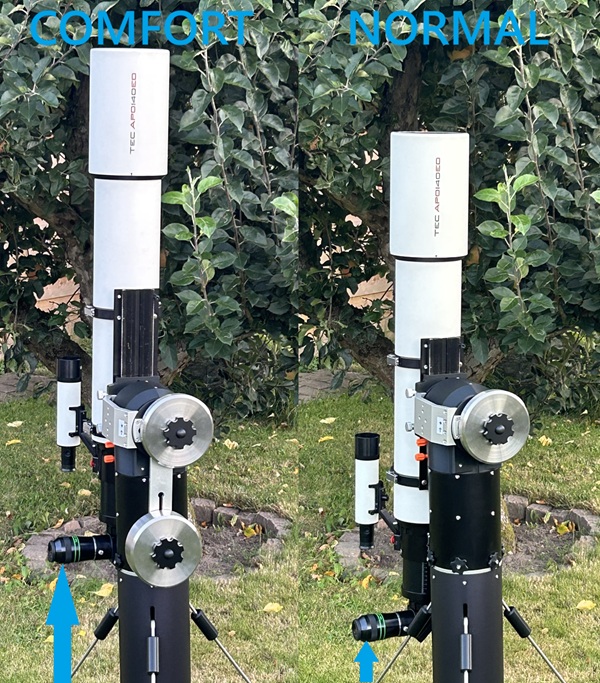
The TTS160 Panther Lite mount introduces a clever feature called “comfort balancing”, designed to reduce eyepiece movement by up to 30cm as object elevation changes.
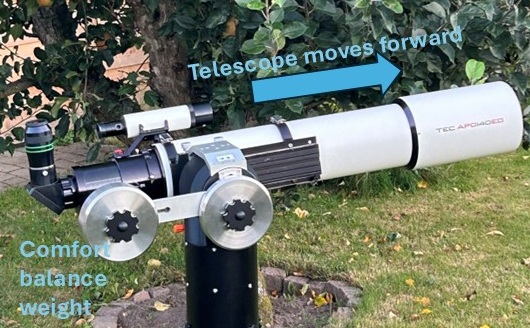
The system works by using a counterweight on a shaft connected to the altitude axle. By adjusting this counterweight and sliding the telescope forward, the eyepiece can be brought closer to the mount’s rotation center. This makes observing objects high in the sky more comfortable and maintains a good viewing posture for objects near the horizon.
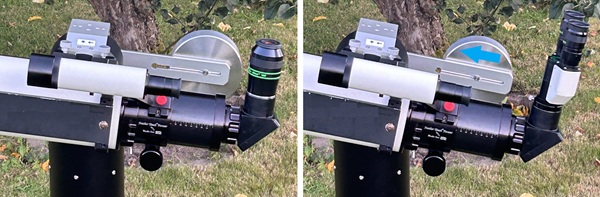
Another advantage is when swapping heavy eyepieces: instead of moving the entire OTA in the dovetail saddle, the counterweight can be shifted slightly on the arm, making the adjustment quick, easy, and ergonomic.
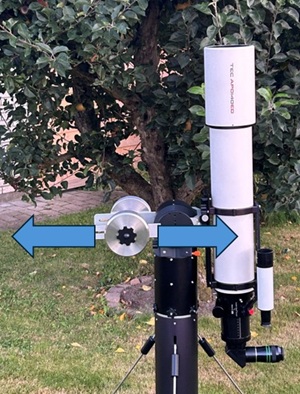
Balancing a Polar-Aligned Mount
Polar-aligned mounts require balancing on two axes, making the process a bit more complex than with alt-azimuth mounts. Balancing should always be done with all equipment installed and just before the final tweaks of the polar alignment.
- Balancing the Declination Axis (keep RA axis locked):
- Keep declination axle horizontal and position the telescope horizontal, pointing south or north. Slide the telescope in the dovetail saddle until balanced. The mount declination clutch must be released to feel the balance.
- Tilt the telescope to a near-vertical position. Unbalance here usually comes from accessories like cameras, guide scopes, or finders. To fix this, it may be necessary to reposition accessories or add small counterweights to the OTA. In many occasions this can be left as it is, but to get the best performance it should be considered.
- Balancing the RA Axis (keep declination axis locked): This is the most important axis for good tracking.
- Place the telescope east or west of the pier, pointing south, with the declination shaft horizontal. Slide the counterweight on the RA shaft until the system is balanced. Many users intentionally set the balance slightly off to one side to keep any backlash loaded consistently.
Conclusion
Counterweights are not a relic of the past. When applied intelligently, they enhance comfort, reduce mechanical stress, and ensure smooth, precise operation for both visual observing and astrophotography.