EAA (Electronic Assisted Astronomy) is Astrophotography kept simple – Alt-Az mounts are tracking mounts kept simple – A perfect match
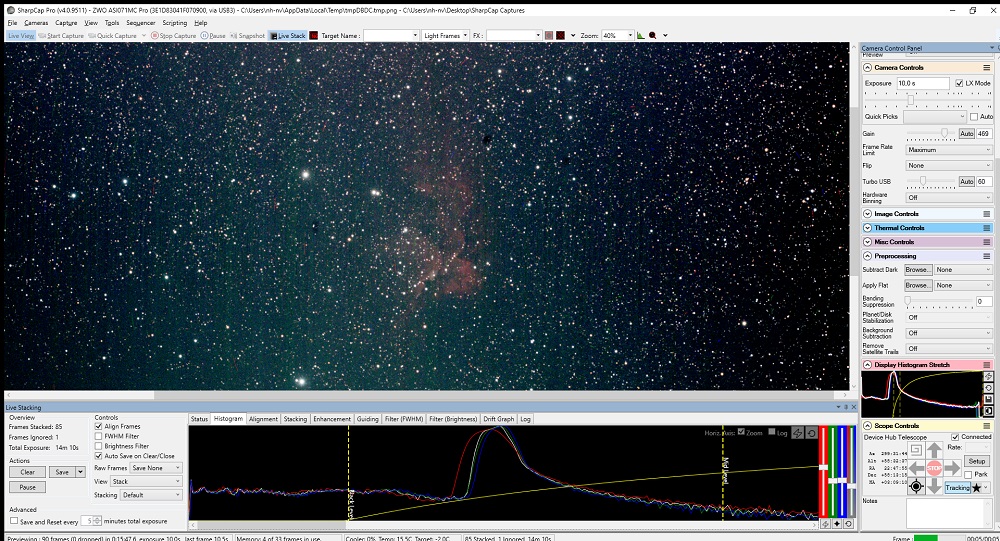
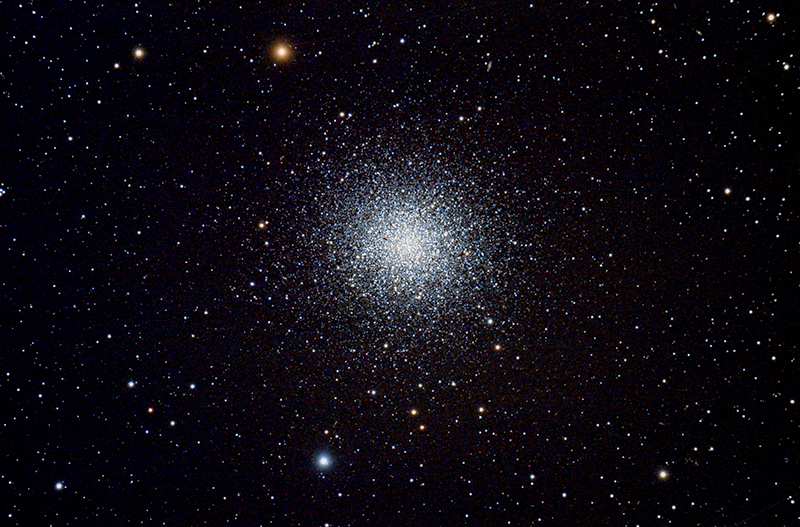
I define EAA as taking short exposure astrophotos and displaying them live. Typically the setup is simple with a One Shot Colour Camera on a telescope carried by a tracking mount. Stacking on the fly of more short exposures is often used. This will make the image improve over time as more frames are added to the stack. When the image is as wished, it is time to move on to observe another target. It’s Live – It’s simple. And it is a great way to “Observe” faint objects and show them to the general audience when doing outreach.
The mounting for EAA – why Alt-Az is the simple choice.
EAA is much like visual observations. You want to use the time to observe and not fiddle with equipment. Everything should be as simple as possible.
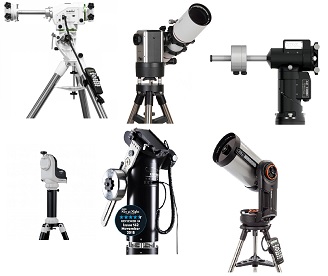
A modern Alt-Az mount with tracking will get you there:
- You can set it up fast
- No need for leveling
- No need for polar alignment
- Just make a simple two star alignment and you are ready
One important thing to be aware of is tracking accuracy. Even though exposures are kept short like 5-30 secs the tracking must be quite good. Many Alt-Az mounts are made mainly for visual observations where this kind of accuracy is not needed. So be sure to use a high quality mount if you want to get the best experience when doing EAA.
It is also possible to auto guide many Alt-Az mounts – Read how to here
Not needing to worry about meridian flip is another great thing from the Alt-Az design.
Field rotation – no issue for EAA
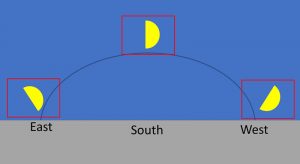
As you probably know the field of view rotates over time when tracking an object with an Alt-Az mount. This is no issue when doing EAA because the short exposures do not show the field rotation. When stacking multiple frames the stacking software automatically aligns the individual frames eliminating any rotation.
Telescopes and cameras for EAA
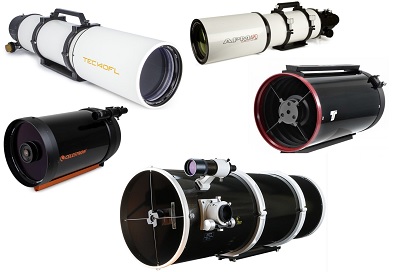
Any telescope can be used for EAA. As with all other types of observations a larger aperture and good quality optics will be an advantage. We are not aiming at getting an APOD (Astronomy Picture Of the Day) but rather to observe an object live, with more details than what is possible visually. For most targets, a low f-number (eg 3-5) will be best but even at f/10 many great observations can be made.
As I expect you are already a visual observer I think getting a good visual telescope and using it for EAA is generally the best way to go.
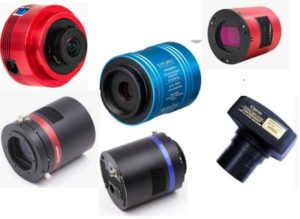
Most observers prefer a colour image so a One Shot Colour camera is the obvious choice. The market is full of CMOS Astro cameras and they can all be used for EAA. If you believe this is something for you I suggest a cooled camera but an uncooled camera does a very good job with the many short exposures.
If you observe from very a very light-polluted area it is a possibility to use a monochrome camera and narrow-band filters.
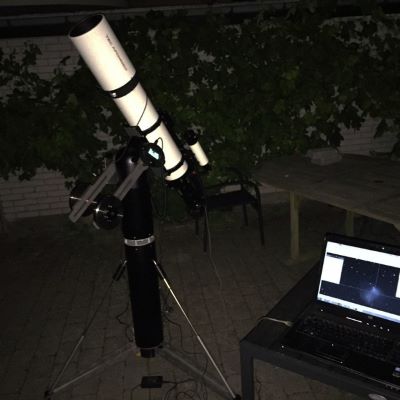
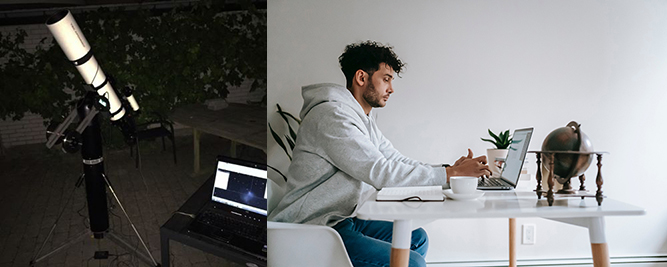
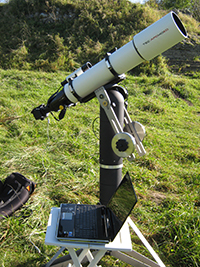
How to do EAA with the Panther Telescope mount
– outside at the telescope or remotely from indoors on a cold winter night
The Panther Alt-Az mount is extremely well suited for doing EAA. The simple setup and fast start-up combined with good tracking accuracy make it easy and nice to use. If you should want to take deeper astrophotos it is easy to add auto-guiding and field derotation. This article will focus on EAA.
EAA STEP-BY-STEP GUIDE
1. Set up the mount and telescope
You can quickly set up the mount with no need to level the pier and no need to Polar Align. Install the telescope and camera and set the balance.
2. Connect a camera, mount, and PC
First, connect the camera to the PC. Typically, a one-shot colour camera just needs a USB cable to the PC. Many cameras are powered through the USB connection, but some will need separate power.
The mount connections are made based on how you would like to control it:
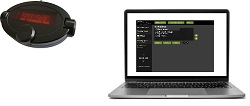
Using the handpad at the telescope

If you just want to use the handpad, you don’t need any connections between the mount and the PC. Just plug in the handpad and the power.
Use the handpad together with a planetarium application on the PC (aligning at the telescope, EAA observations from indoors if wished)
In this case, you will use the handpad for the basic alignment and then afterward use a PC application for slewing to the targets (over Ascom). You must plug in the handpad, the power cable, and an Ascom cable from a USB port to the PC port on the mount head.
Use the PC for all controls (aligning and EAA observations from indoors if wished)
To have complete control of the mount from the PC you must plug in the Handpad to USB cable and use the remote Handpad Emulation App to control the mount. Besides this, you can also connect an Ascom cable to control the mount from any PC application using Ascom.
3. Aligning the mount
Aligning the mount manually at the telescope
The easy traditional way is just to make a two-star alignment with an eyepiece in the telescope. To get the best tracking be sure to center the alignment stars precisely. You can also install the camera and use that for the alignment. If you use live video it is very easy to find and center the alignment stars.
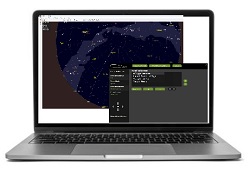
Aligning the mount from the PC – perhaps from indoors – using plate solving
If you have cold winter nights, like we often have in Denmark, you might want to get indoors as soon as possible. When you have set up the complete system, point the telescope in the direction of the pole star. No need to point precisely. It does not even need to be in the finder scope. You can do it in the daytime, just knowing approximately where north is and the approximate altitude (the same as your latitude).
Now at the PC – indoors using a remote desktop or outside at the connected PC:
- Connect the “Handpad Emulation app” to the mount
- Using the Handpad app, make a One-star alignment on Polaris (This will set the mount coordinates near where the telescope is pointing. It is ok if it is off by several degrees)
- Get the camera running and focused.
- Connect the plate solve app to the mount using Ascom. (This will feed the mount pointing coordinates back to the plate solver, giving much faster solves and fewer failures)
- Take a short exposure (1 sec). Plate solve the image. Notice resulting RA, DEC.
- Use the handpad app to make a One-star alignment and use the plate solve coordinates (RA, DEC) as alignment target (Menu path: Align Mount – 1 star – Coordinates).
The mount is now tracking. (For the most precise alignment, repeat steps 3 and 4 now with the mount tracking.) - Using the handpad slew the telescope in Azimuth some 60-90 degrees (distance not important)
- Take a short exposure (1 sec). Plate solve the image. Notice resulting RA, DEC.
- Use the handpad app to add a 2. alignment “star” and use the plate solve coordinates (RA, DEC) as alignment target (Menu path: Align Mount – 1 star – Coordinates).
The mount is now precisely aligned, and the alignment takes the unlevelled setup angles into account.
4. Slew to the targets and start observing
With the mount now aligned, it is easy to slew to any target using the Handpad or the Handpad App and any connected Planetarium software.
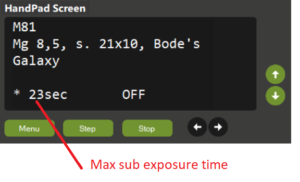
Set the handpad to Display Field rotation coordinates. The left coordinates will then show the maximum number of seconds it is possible to expose one sub without getting visible field rotation. This can be a great help in picking the best exposure time.
Enjoy.