![]()
PHD2 is a fantastic tool for guiding our telescope mounts. Most of the basic features and settings were created with a German Equatorial Mount in mind. Using it with an Alt-AZ mount is just as precise, as long as you have the right settings.
In this post I will explain how to setup PHD2 when using an alt-az mount with special focus on the Panther mount, but the general aspects will be the same for all Alt-Az mounts.
Two simple terms you need to know
PHD2 was created with Equatorial mounts in mind. Therefore PHD2 uses the terms Right Ascension axis and Declination axis. When guiding an Alt-Az mount:
- Azimuth is equal to Right Ascension AZ = RA
- Altitude is equal to Declination ALT = DEC
How to connect the mount to PHD2
There are two ways to connect the mount and PHD2:
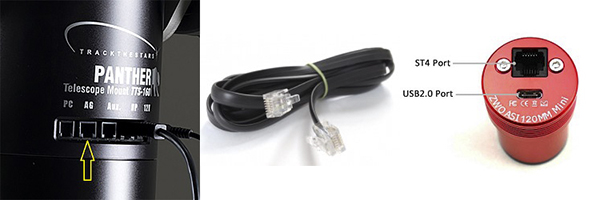
- Using the ST4 interface.
To use this principle your guide camera must have a ST4 compatible guide port. All dedicated guide cameras has this type of port. Connect the ST4 port on the camera to the AG port on the mount head.
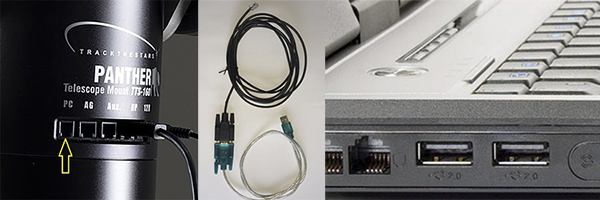
- Using PC interface and ASCOM driver
You must install the ASCOM platform and the Ascom driver called: “Meade LX200 Classic and Autostar #494, #495, and #497”
Use a USB-to-Seriel adapter and the PC cable to connect the USB port on the computer to the PC port on the mount head.
ALWAYS connect ALL the cables before powering up the mount. Then power up the mount, align it and leave it in the operation screen.
Setting up PHD2 for Alt-Az guiding
Start PHD2 on the PC.
Before starting to guide it is necessary to adjust some settings. In this article I will focus mainly on the settings that are important (different) when using an Alt-Az mount. I recommend you look at the user manual for PHD2 for a general description of the other settings.
This screen is shown at startup.
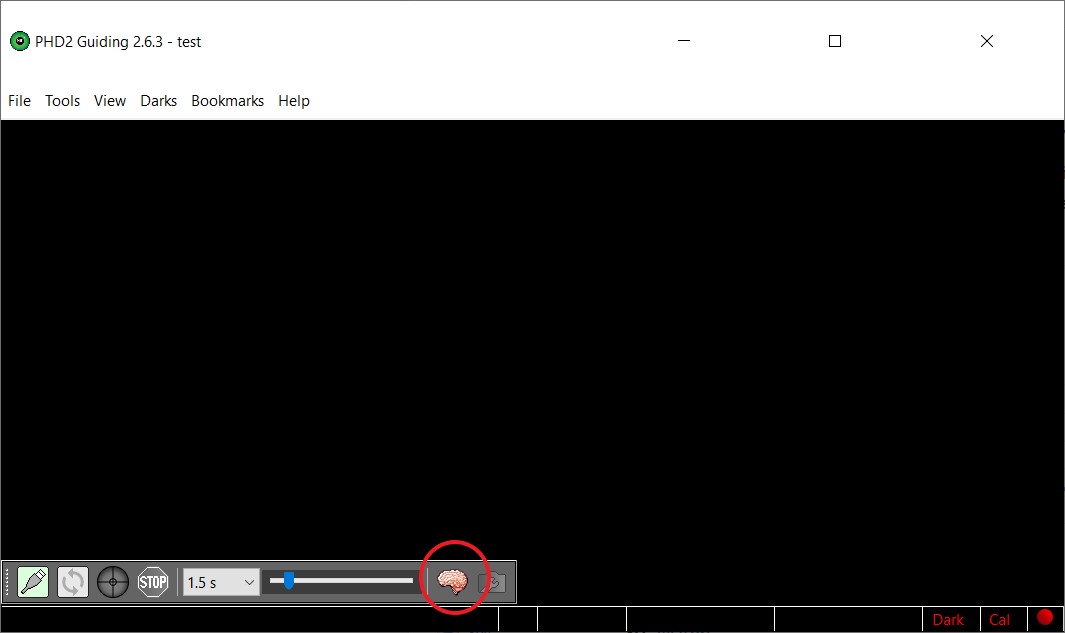
Click on the brain.
A new window with four tabs pops up. We will look at two of the tabs – guiding and algorithms:
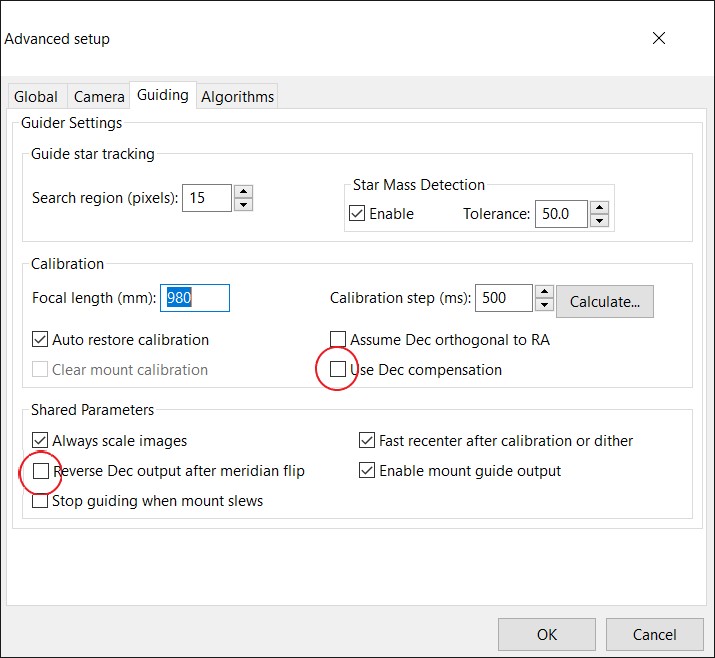
In the Guiding Tab be sure to adjust these settings:
- “Use Dec compensation”
If you use the ST4 connection this setting must be ON
If you use the PC/ASCOM connection this setting must be OFF - “Reverse Dec output after meridian flip”
Alt-Az mount do not flip. Must be OFF
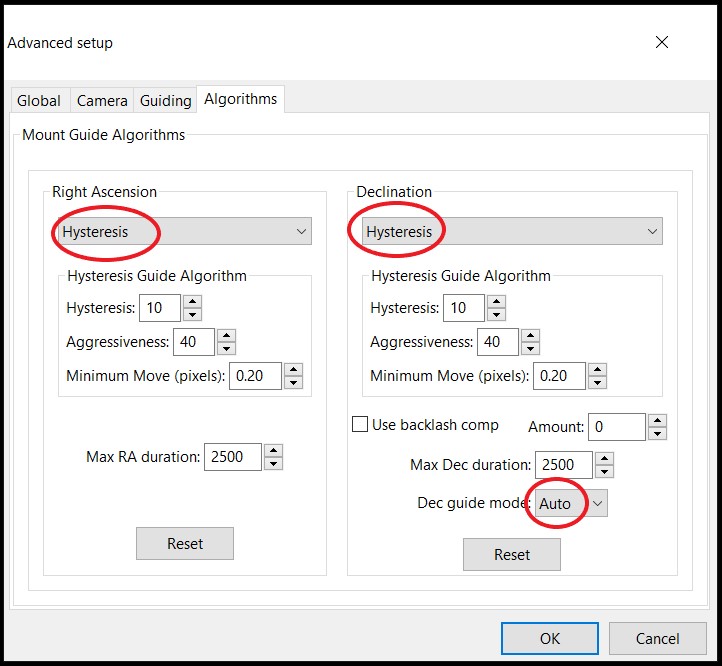
In the Algorithms Tab be sure to select:
- “Hysteresis” on both Right Ascension and Declination.
On an Alt-Az mount both axis are tracking all the time. Therefore both axis must be guided as the RA axis on an equatorial mount. There is no backlash on an Alt-Az mount when guiding because the motors are never reversed. - “Auto” as Dec guide mode – this is to allow guiding in both directions on the Alt axis.
Lets connect the equipment in PHD2
Click on the connector icon in the bottom left corner.
The Equipment connection window pops up.
- Select camera
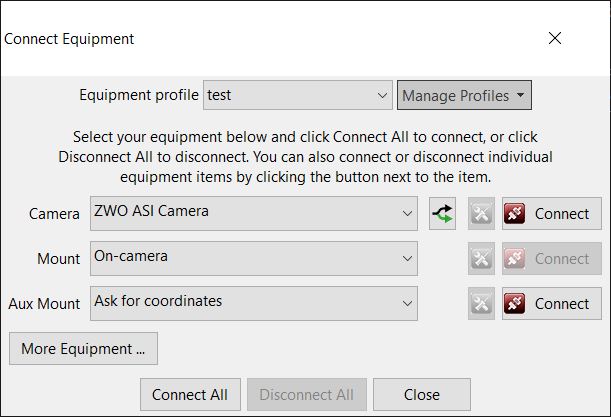
Select the guide camera you use - Select Mount – if you use the ST4 connection do like this:
- Mount: Select ON CAMERA
- Aux Mount: Select ASK FOR COORDINATES

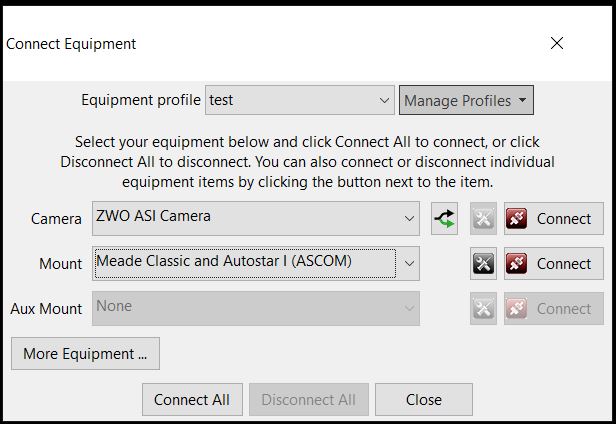
- Select Mount – if you use PC/ASCOM connection do like this:
- Mount: Select Ascom driver: Meade Classic and Autostar I
The port number of the seriel comm port on the PC must be correct. Click the toolbox icon to see the Ascom driver setup window. Change port number if connection is not succesful. - Aux Mount: None
- Mount: Select Ascom driver: Meade Classic and Autostar I
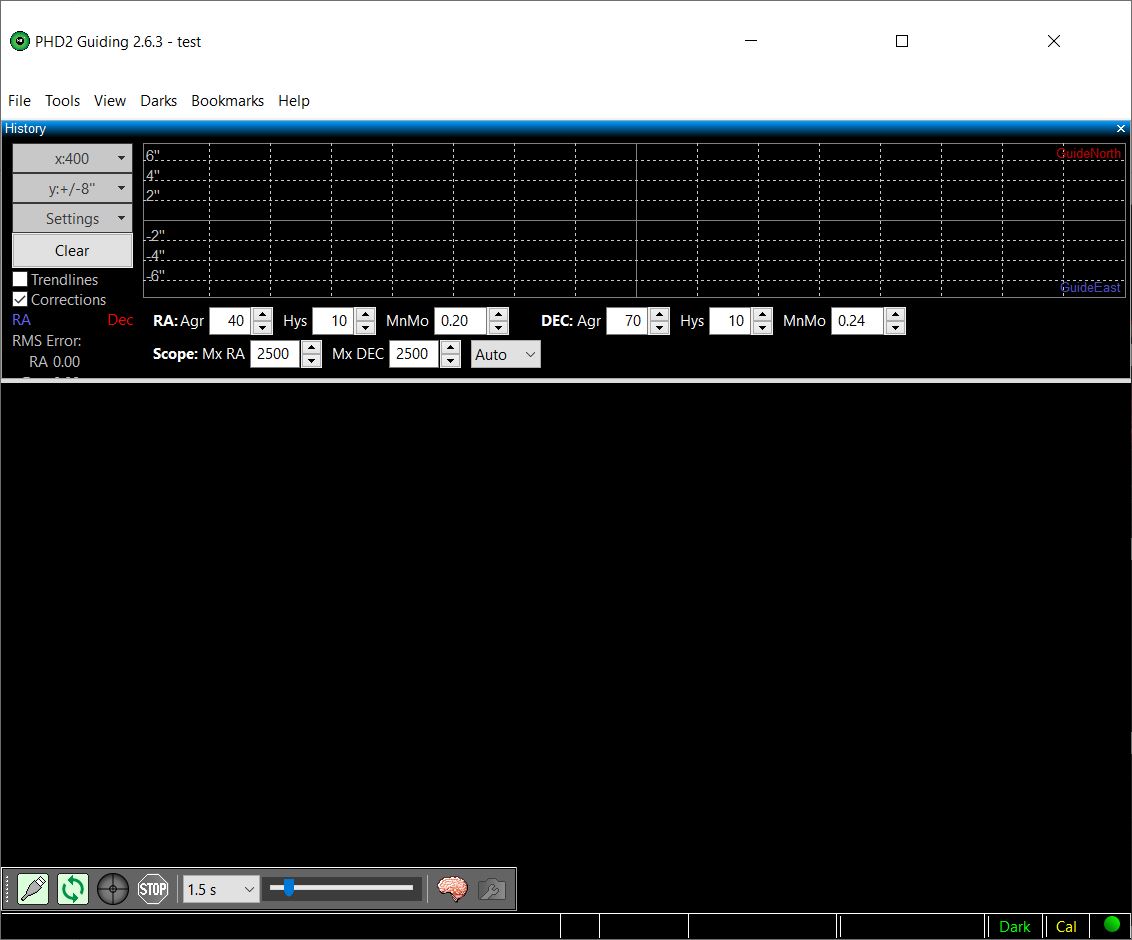
When camera and mount is connected PHD2 will show this screen:
Ready to calibrate the guider and guide
Calibration is the process where PHD2 moves the mount small distances in each direction and take images at each position. Based on this the PHD2 learns how the mount response to the guide commands and the finds the camera angle. Calibration is a completely automated process that only takes about a minute to perform.
Here follows the things you must be aware of to get a good calibration and a good guiding performance (again with main focus on the things related to Alt-Az mounts):
- Focus guide telescope carefully
- On the Panther Mount guide speed should be set to 10″/sec (this is selected in the setup menu)
- The Altitude of calibration star must be considered:
-
- Calibrate at an Altitude of 30-40 degrees
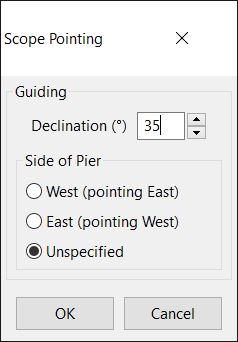
When starting the calibration process PHD2 will ask for the Declination – input the ALTITUDE – no decimals neededif you use the ST4 connection Dec compensation is available. Therefore:

- Calibrate at an Altitude of 30-40 degrees
- if you use PC/ASCOM connection Dec compensation will not work. Therefore:
- Calibrate on the same altitude as the target (just use actual guide star). If target is above 75 degrees in altitude calibrate at around 75 degrees.
- Calibration must be performed for each target if altitude changes more than 10-15 degrees. It only takes 1 minute to calibrate so why not.
-
- Just “Push Here Dummy” to start the calibration and guiding.
Appendix: Indoor testing of connections
Manual guide test at daytime/indoor
When setting up new equipment it can be nice to complete as much as possible indoor not wasting clear sky. So when you have installed PHD2, Ascom and made all the settings it is nice to see if it works.
If you connect camera, mount head and the PC, you can follow this procedure for a basic check. If any step fails fix it before you move on:
- Align the panther mount with a “fake” alignment. Just pick any star (or the sun) that you know are above the horizon and make a one star alignment on it. The mount can point anywhere. The mount will now track and show steady equatorial coordinates (of the alignment star)
- Connect Camera in PHD2
- Connect mount – On camera if ST4 cable – Ascom driver if PC cable
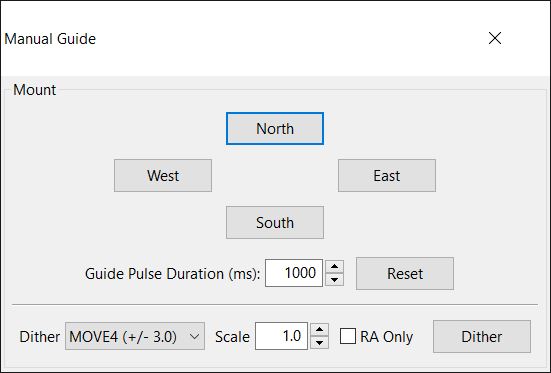
- On the main PHD2 screen select the menu item “manual guide”

- Now push one of the buttons. If you watch the Panther handpad you will see the coordinates change. We are talking few arc-seconds. And be aware that Right Ascension is displayed in time seconds – not arc-seconds – so the movement will be much smaller in RA.
- You must be able to see a movement in all four directions. No conclusions can be made on how much movement is seen, because that depends on other parameters not known in this test situation.
Enjoy the clear night sky.