The trip into Alt-Az astrophotography continues – if you have any questions or comments, write them at the bottom of the page or send me an email.
In the earlier post “Astrophotography with Alt-Az telescope mounts”, the possibilities for taking astrophotos with Alt-Az mounts were introduced. There are two basic approaches.
1. Take multiple short exposures to eliminate the effects of field rotation (read more)
2. Use a rotator device to rotate the camera and achieve precise equatorial tracking
If you wonder why we want to image with an Alt-Az mount see this post “The modern Alt-Az telescope mount – Easy, fast and precise”
The first principle has already been described in an earlier post. We will now look more into the second principle.
Rotating the camera can be done either with a rotator unit placed between the telescope OTA and the camera or by rotating the entire OTA with the camera installed.
In this post, we will focus on the solution where the entire OTA is rotated. The other solution will be described in a future post.
The telescope rotator
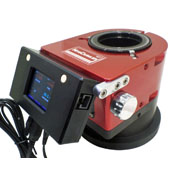
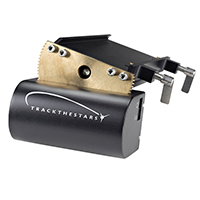
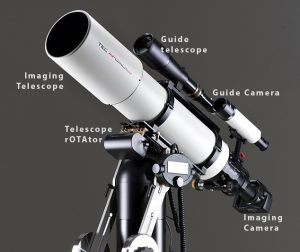
A telescope rotator is a rotation unit that installs between the basic Alt-Az mount and the telescope OTA. The only unit available on the market today is the “telescope rOTAtor” from Track The Stars. It is a unit I developed about 10 years ago and started producing about 4 years ago. I am not aware of any earlier adaptations of such a device.
Principle of the telescope rotator
To compensate for the field rotation (read about field rotation here), the telescope rotator rotates the entire OTA and any piggybacked guide telescopes or photo lenses. The rotation speed and direction is controlled by the Alt-Az mount software. This allows for compensation for all setup angles leading to very easy setup of the mount needing no leveling at all – and of course no polar alignment.
The telescope rotator unit from Track The Stars is based on a dovetail plate that installs into the saddle on the mount. On top of the dovetail plate is a rotatable dovetail saddle driven by a worm gear.
Pros and cons of the telescope rotator
Compared to the more traditional camera rotator (used on all larger professional telescopes), the telescope rotator has a number of advantages:
- It is possible to guide through a piggybacked guide telescope (makes it easier to find a suitable guidestar than using off axis guiding)
- It is possible to image through piggybacked telephoto lenses
- Optics and camera stay in the same angles.
Compared to the more traditional camera rotator the telescope rotator has a few dis-advantages:
- For long integration time, the rotator must be rewound every 1-3- hours (interval depends on where in the sky the telescope is pointing)
- When the rotator is rewound, the field of view is rotated. For smaller targets, this is ok. For larger targets, the camera must be rotated to compensate (a fast approximate rotation is sufficient as the stacking software handles any differences).
How precise must the derotation be? – a factor 50 less critical than the main drives of the mount.
You might think adding the rotator will give new critical demands to the drive involved. But actually the demands to the precision of the derotator is much smaller than expected!
When you guide your telescope mount – Polar aligned GEM or Alt-Az – there is a certain needed accuracy. This accuracy depends on the focal length, the camera pixel size and the seeing. In this example we will focus only on the focal length.
If you image with a focal length of 1000 mm and the mount tracks with an accuracy of 1 arc-second the error seen on the sensor at the focal plane will be:
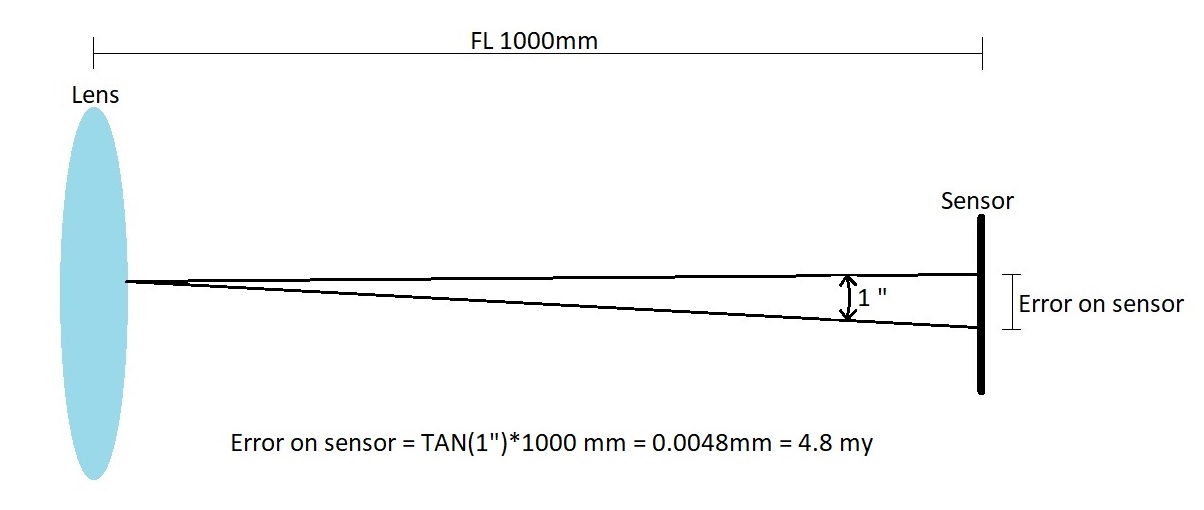
So with a tracking accuracy of the mount head of 1 arc-second the error on the sensor will be 4.8 my or close to one pixel on many cameras.
When it comes to rotating the camera the focal length has no influence. It is only the size of the sensor that matters:
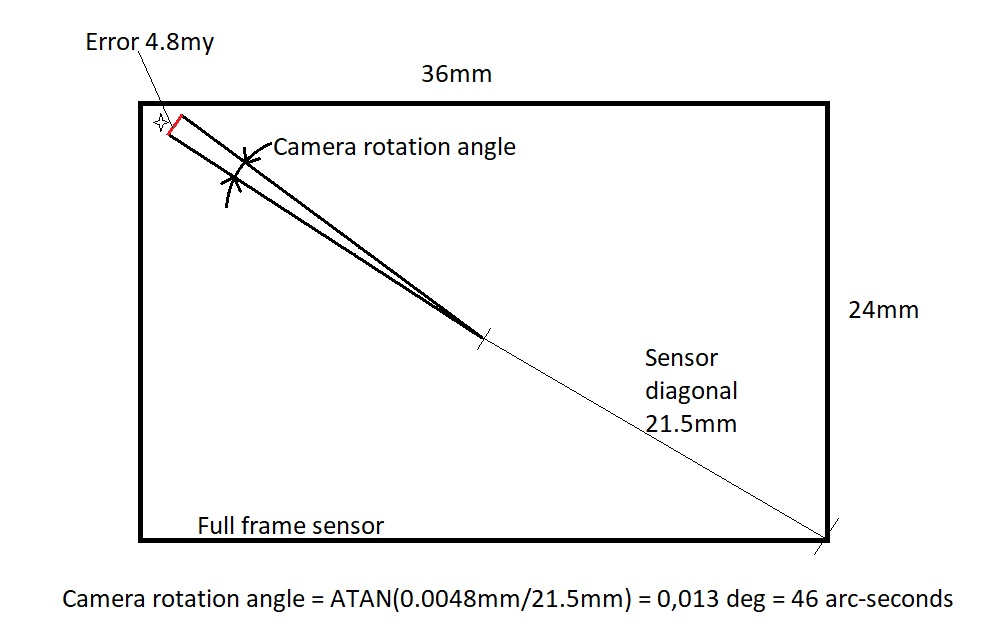
This calculation shows that even with a full frame sensor the rotator must rotate 46 arc-seconds to move a star 4.8my at the very corner of the sensor. So the accuracy needed of the camera/telescope rotator is a factor of 50 less than what is needed of the main mount drives. So don’t worry about this.
Guiding when using a telescope rotator – as easy as guiding other mounts
Guiding is just as easy as with a polar aligned mount when the following is observed:
- The guide camera must rotate with the imaging OTA. This means you can guide through a piggyback mounted separate guide scope. Or you can guide with an off-axis guider.
- You cannot guide through a guide telescope that is mounted elsewhere on the alt-az mount (not rotating on the rotator)
- When you guide an alt-az mount (with or without rotator), the guide software must be set to handle both axis as normal tracking axis. In some guide software, the declination axis of a polar aligned mount is handled differently and that does not work in alt-az mode. Read more on guiding here.
When the rotator rotates the guide camera, the angles between the camera and the mount axis changes. You could think that this would influence the guiding. With a telescope rotator like the one from Track The Stars, the total rotation angle is 28 degrees. All tests show that this angle change has no practical influence on the guiding performance. When it comes to camera rotators that can derotate all night long, this is a different matter – more on that in a future post.
How long time can you expose with a telescope rotator? As long as you wish!
Typically, the telescope rotator can derotate for 1-3 hours. This means you can make subs of the same length. No one makes subs of 1 hours but 20 to 30 minutes are sometimes used with narrow band and that is no problem with a telescope rotator. Of course, as with other mounts, this demands proper guiding. When the rotator reaches the end stop, it is rewound and the next set of subs can be taken as long as wished. There are no limits to the max combined integration time.

Step by Step – how to use an Alt-Az mount with telescope rotator
One of the great advantages of Alt-Az mounts is the compact design and the easy setup. Therefore, they are superb for transportable use – going to a real dark location or just setting up in the backyard.
Here follows a step-by-step guide on how to set up and start imaging.
Setting up:
- Set up the pier/tripod, mount head and rotator (no leveling or polar alignment needed)
- Install OTA’s and counter weights
- Install imaging and guide cameras
- Make connections to PC as needed
- Balance the mount (link)
- Power up mount and make a two-star alignment
Take subs:
- Focus camera on a star close to the final object
- Make a goto to the final object
- Rewind rotator (rotator will rotate to the start position but will not start to track)
- Take short subs (binned) to frame object. Move telescope as wished.
- Start guide software and pick guide star
- Calibrate guider
- Start rotator tracking
- Start autoguider
- Start taking subs
Rewinding rotator (when the rotator has reached the end stop):
- Stop autoguider
- Rewind rotator
- Rotate imaging camera if full FOV is used.
- Start autoguider (calibration not needed)
- Continue imaging.
Summing up
Using a telescope rotator is a very easy and fast way to do astrophotography. Enjoying the easy setup of the Alt-Az mount, it is possible to take precisely tracked images as with any polar aligned mount. You can make as long exposures as you wish, recognizing that you must rewind the rotator every 1-3 hours. So there is no limits to what you can image with a telescope rotator.
If you want a more automated setup, the telescope rotator can be partly automated but the camera rotator will be a better solution.